| Theories and Techniques of Oral Implantology (vol.2) (published 1970) | Dr. Leonard I. Linkow |
|
|
Next Page |
| This is an archival HTML version of this book originally hosted here in 2006. The HTML may not display well on modern browsers. Please view the modern PDF Version for a better viewing experience. |
568 Theories and techniques of oral implantology
work was placed over the bone (Fig. 12-92), and one by one the transfixation pins were set horizontally through the holes previously made in the bone. These pins were held in place because one end had been flattened before insertion to prevent slipping through the holes. Once a pin had been inserted, that portion protruding from the implant was cut off and flattened against the implant by rotating a heat-less stone with running water. No part of the implant or pins thus protruded excessively (Fig. 12-93).
Sutures were applied to close the wound (Fig. 12-94), and after 5 or 6 days they were removed with uneventful healing. About 3 weeks later, the tissues were completely healed (Fig. 12-95). Impressions were taken for a two-unit splint to fit over the implant (Fig. 12-96) . A cross-sectional x-ray shows the implant in position (Fig. 12-97) .
MISCELLANEOUS CASES
Horizontal transfixation pins may also be used to help stabilize a full arch implant for a completely edentulous maxilla (Fig. 12-98). These pins
are larger than those used for partial restorations and do give some added retention. An acrylic-over-gold thimble fixed full arch denture was fabricated for this patient.
Partial mandibular implants are shown in Fig. 12-99. Some of these implants, which are the lingual finger design, have been functioning as long as 12 years.
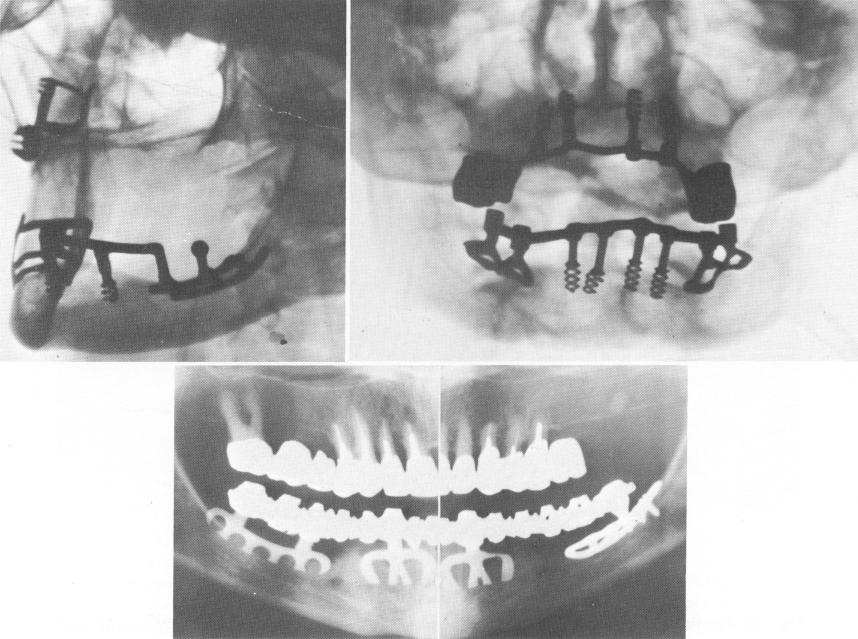
In some cases it is necessary to use both endosseous and subperiosteal implants (Fig. 12-100). Again the type of implant depends on the condition of the site. The endosseous implants were inserted after the subperiosteal implants had been cast from direct bone impressions. Both types of implants were inserted simultaneously and splinted together with a fixed full arch denture. Fig. 12-100, C, shows three blades and one unilateral subperiosteal implant supporting a full arch fixed prosthesis.
UNIVERSAL SUBPERIOSTEAL IMPLANTS
Sometimes, instead of making bilateral posterior subperiosteal implants when a few remaining anteri-
Fig. 12-100. In some cases a combination of endosseous and unilateral or bilateral subperiosteal implants is sometimes used.
|
|
Page 568 |
Next Page |
|
Copyright warning: This information is presented here for free for anyone to study online. We own exclusive internet copyrights on all content presented on this website. We use sophisticated technology to identify and legally close down websites that reproduce copyrighted content without permission - so please don’t do it.
|