| Theories and Techniques of Oral Implantology (vol.2) (published 1970) | Dr. Leonard I. Linkow |
|
|
Next Page |
| This is an archival HTML version of this book originally hosted here in 2006. The HTML may not display well on modern browsers. Please view the modern PDF Version for a better viewing experience. |
514 Theories and techniques of oral implantology
than porcelain and were articulated on a Hanau articulator (Fig. 11-162) .
Today, however, Linkow often uses palladium and gold rather than platinum and gold for porcelain-baked-to-metal restorations for the edentulous maxillary cases. This creates a prosthesis even lighter in weight than acrylic processed on gold.
Both final prostheses were set over the implants in both jaws, using one of the temporary cements mixed with Vaseline or Calendula* (Fig. 11-163). The patient wore them for a few days to test for comfort and freedom from soft tissue impingements. When he returned, the bridges were removed and their tissue-bearing surfaces relieved. With oxyphosphate of zinc cement, both bridges were then cemented into their respective positions (Fig. 11-164). They were then once more carefully spot-ground for any prematurities.
A final Panorex shows both bridges in position (Fig. 11-165, A). Fig. 11-165, B, illustrates another edentulous maxilla and edentulous mandible restored with blades. Fig. 11-165, C, represents another case of a completely edentulous maxilla and partially edentulous mandible.
Case 15
A continuous blade implant for an edentulous maxilla
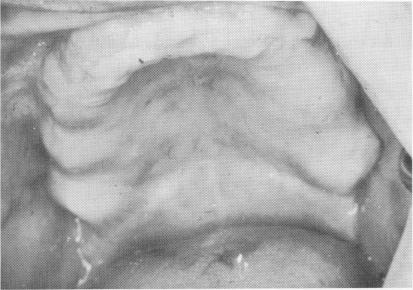
There are times when, because of extremely low-flaring sinuses with numerous areas of bone porosity, individual blades cannot provide adequate support in an edentulous maxilla. Therefore a continuous implant was designed by Linkow and Norman Mulnick. This implant was shaped to the contour of the crest, hopefully creating more retention by acting as a self-splinting device. It was also hoped that the relative instability of those portions of the blade set in porous bone would be compensated for by the fact that there was enough of the rest of the blade in denser bone. A few cases were tried, such as that on the edentulous maxilla detailed here (Fig. 11-166) .
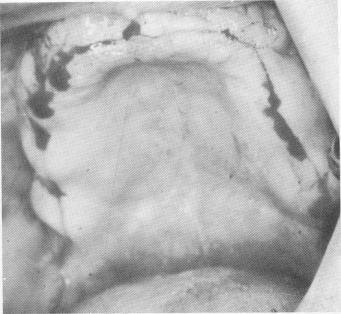
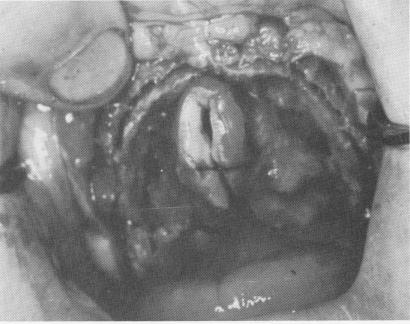
The soft tissue covering the edentulous maxilla was pierced from tuberosity to tuberosity along the crest of the ridge with a sharp scalpel (Fig. 11-167). The tissue was retracted with a periosteal elevator to expose the buccal and labial aspects of the ridge and part of the palatal portion. A groove was created along the center of the ridge from one side of the arch to the other with a No. 700L fissure bur. Its depth was never more than 3 mm. (Fig. 11-168).
*Homeopathic healing salve, Boericke & Tofel, Philadelphia.
Fig. 11-166. An edentulous maxilla with very little bone below the maxillary sinus.
Fig. 11-167. The incision is made from retromolar area to retromolar area.
Fig. 11-168. Underlying alveolar crest was exposed and a 2- to 3-mm. continuous groove was made. (From Linkow, L. I., and Weiss, J. L.: The endosseous blade: a progress report, Prom. Dent., No. 5, 1969.)
|
|
Page 514 |
Next Page |
|
Copyright warning: This information is presented here for free for anyone to study online. We own exclusive internet copyrights on all content presented on this website. We use sophisticated technology to identify and legally close down websites that reproduce copyrighted content without permission - so please don’t do it.
|