| Theories and Techniques of Oral Implantology (vol.1) (published 1970) | Dr. Leonard I. Linkow |
|
|
Next Page |
| This is an archival HTML version of this book originally hosted here in 2006. The HTML may not display well on modern browsers. Please view the modern PDF Version for a better viewing experience. |
Operative tips 269
removed and a regular-size pin is pushed into the hole. The head of the new pin is then attached to the chuck and contra-angle and driven deeper to its determined depth.
When close to the sinus, the pin should be slowly rotated with the contra-angle and inserted only a few millimeters at a time. Every few millimeters the operator should gently push it upward, holding it with a wide-nosed plier. If the pin slides in easily, it has probably entered the antral floor. If it has, it should be removed. Always—and this cannot be repeated too often—the progress of an implantation should be checked with x-rays. Such studies help avoid this type of mistake.
Preparing the pin heads. The protruding pins should be cut short so that they will not interfere with occlusion. This can be done with a sharp cutting shears or with a high-speed contra-angle and fissure bur, holding the pin with a pliers (Fig. 7-24) . No rotating instrument should be applied to the superficial portion of a pin without stabilizing it with a pliers where it emerges from the soft tissues. When bending the protruding ends of the pins to form the head of the tripod, a narrow-nosed pliers must be used near the bone to hold the pin and pre-vent it from pushing against the bone (Fig. 7-25), while the other pliers bends them.
The remaining heads of the pins should be notched to provide a more varied surface for acrylic adhesion. Notching is done with the bur, again holding the pins.
Building the core. Some prefabricated caps or tubes that can be filled with acrylic and set over the pins are available. However, these tend to trap air bubbles; the weakened core then breaks, leaving the pins loose inside the cap.
The acrylic core should be built up layer by layer with a paintbrush, starting at the base of the pins (Fig. 7-26). This forms a solid core that can be trimmed for a full crown restoration.
Making impressions. Never take a compound tube impression of an acrylic core; some of the material can creep between the core and soft tissues. When the impression is removed, the core is tugged and the pins possibly dislodged.
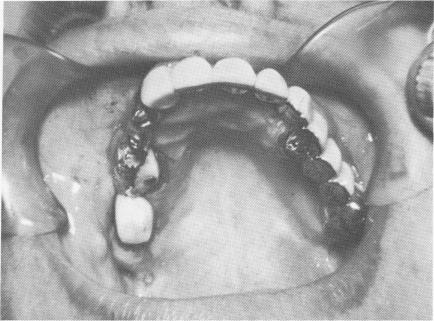
Using a template. When a triplant must be used in a long edentulous span, a template should be included in the restoration (Fig. 7-27) . This will pro-vide additional stability and brace the triplant against movements caused by the soft tissues pulling on its head. The template will rest on the soft tissues, be scalloped according to the crowns overlying them,
Fig. 7-27. A template is needed to supply additional stability. Triplants are to be used in the posterior regions and vent-plants in the anterior regions of this full arch template.
Fig. 7-28. This situation was saved by inserting the pin alongside the template and binding to it with hardened acrylic resin.
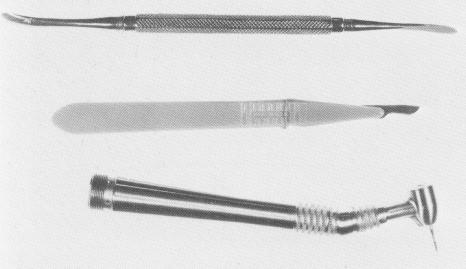
Fig. 7-29. Basic instruments for blade implant surgery. Top, A periosteal elevator; middle, scalpel; bottom, a high-speed contra-angle with a No. 700 L fissure bur.

|
|
Page 269 |
Next Page |
|
Copyright warning: This information is presented here for free for anyone to study online. We own exclusive internet copyrights on all content presented on this website. We use sophisticated technology to identify and legally close down websites that reproduce copyrighted content without permission - so please don’t do it.
|