| Theories and Techniques of Oral Implantology (vol.1) (published 1970) | Dr. Leonard I. Linkow |
|
|
Next Page |
| This is an archival HTML version of this book originally hosted here in 2006. The HTML may not display well on modern browsers. Please view the modern PDF Version for a better viewing experience. |
272 Theories and techniques of oral implantology
Fig. 7-36. To tap the shoulders below the bone, the chisel is rotated parallel to the implant's shoulders.
(Fig. 7-33). The grooved chisel is used to straddle the shoulder buccolingually and start it into the bone (Fig. 7-34), and the flat chisel is used to tap the shoulders level with the bone (Fig. 7-35). To tap the shouders below the bone, the straight chisel is rotated parallel to the implant's shoulder (Fig. 7-36).
Suturing materials. Suturing materials include hemostats, preferably with the newer carbide beaks that grip the suture needles more adequately than all stainless steel hemostats, and suture needles and silk thread, preferably .000 size, for readapting and closing the incised tissues near and around the protruding blade post.
Laboratory equipment. On hand should be interchangeable gold copings cast in either type of gold so that porcelain as well as veneer crowns can be processed directly to them. Also, duplicate implant posts are needed for facilitating laboratory procedures.
Tips. Because of the blade's great adaptability, there are numerous considerations involved in selecting and inserting the implant.
Choosing an appropriate implant. There is a blade for almost any site. Open-ended blades are preferable for dense mandibles. These are easier to tap into the bone, and some of the alveolar bone between the metallic struts remains intact. In porous tuberosity areas a blade implant with fairly elaborate
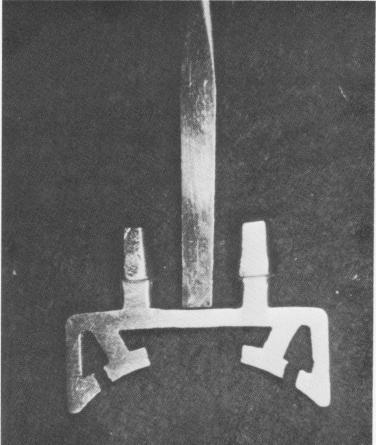
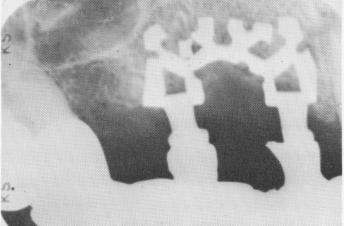
Fig. 7-37. A specially designed blade is used to circumvent an open socket to avoid disturbing the blood clot in a fresh open socket.
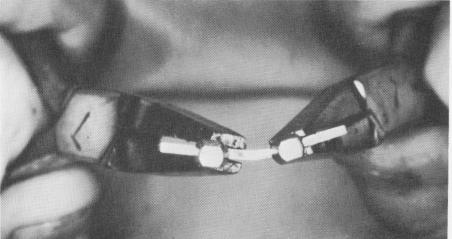
Fig. 7-38. To bend a blade to follow the curvature of an arch, two wide-nosed pliers are used.
internal latticework should be used. This type permits more involvement with the bone and connective tissues. A single-posted blade should not be used in the center of the anterior portion of the maxilla or of the mandible for esthetic reasons. Instead, a double-posted blade, each post representing the left and right central incisor, may be employed.
Unlike most other implants, a blade implant can be placed in the area of an open socket. Be-cause the blade's anteroposterior length extends into the bone flanking the socket on its mesial and distal aspects, there is enough mechanical retention to stabilize the implant until new tissue develops. A specially designed blade with shoulders going below the floor of the socket and with two posts protruding from these shoulders may be used (Fig. 7-37) .
Although there is no specially curved blade for the cuspid area, any blade may be bent appropriately (Fig. 7-38).
Incising the site. The incision should be made with a sharp scalpel straight down through the soft tissues and periosteum to the bone. A single incision is all that is needed when there are no nearby teeth. Cross incisions only complicate healing, making the
|
|
Page 272 |
Next Page |
|
Copyright warning: This information is presented here for free for anyone to study online. We own exclusive internet copyrights on all content presented on this website. We use sophisticated technology to identify and legally close down websites that reproduce copyrighted content without permission - so please don’t do it.
|