| Theories and Techniques of Oral Implantology (vol.1) (published 1970) | Dr. Leonard I. Linkow |
|
|
Next Page |
| This is an archival HTML version of this book originally hosted here in 2006. The HTML may not display well on modern browsers. Please view the modern PDF Version for a better viewing experience. |
Operative tips 273
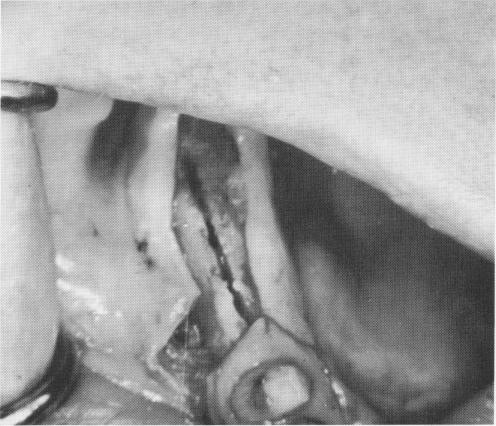
Fig. 7-39. The groove must be narrow and clean.
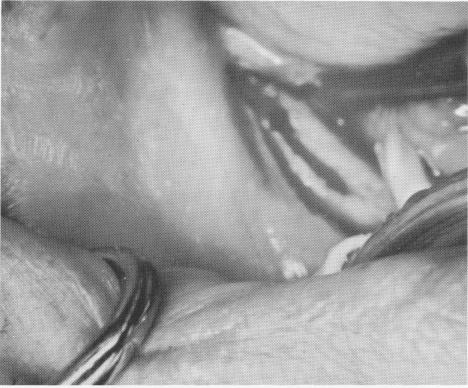
Fig. 7-40. This groove is too wide, reducing wedging action of the blade against bone.
tissues easier to disturb by movements of the cheeks, tongue, and muscles. When a natural abutment tooth is very close, it may be necessary to angle the incision for easier retraction.
Making the groove. The groove must be narrow and clean-cut (Fig. 7-39). If it is too wide buccolingually, the wedging action of the blade against bone is reduced (Fig. 7-40). The length of the groove should correspond to the length of the blade.
In making the groove, the depth and direction of the bur are determined by a number of factors, such as the bone density and the buccolingual or buccopalatal thickness of the alveolar process. If there is enough bone in the mandible above the canal, the bur should be drilled to its entire length. In the tuberosity region of the maxilla, a 3- to 5-mm. depth is all that is usually necessary.
When dealing with a knife-edge ridge in the maxilla, the bur is drilled to its entire length in order to reduce trauma when tapping the blade into position. If too shallow a groove is made, one of the walls might fracture. In a mandibular knife-edge ridge, which is actually an unresorbed mylohyoid ridge, the groove must be made buccal to the knife edge, providing there is enough alveolar bone height available.
Sometimes a blade can be placed in the posterior area of a mandible with very little alveolar bone height by merely making the groove near the external oblique ridge, which is buccal to the inferior
alveolar canal. Also, if a mandibular blade centered in the crest of the ridge must be removed because of poor technique, another blade can be immediately set into the bone buccal to the first blade along the external oblique ridge.
Seating the irnplant. The blade is gradually tapped to its proper depth with the inserting instrument and the plastic-headed mallet. The shoulder of the blade must always be buried from 1 to 2 mm. beneath the alveolar crest. If too much of the shoulder is out of the bone, epithelial tissues usually invaginate below the shoulder into the vented portion of the blade.
If the operator cannot lightly and firmly tap the implant home, he should not use harder blows but rather remove the blade and deepen the groove.
When a sinus is approached, the tapping should be particularly gentle. Thus if the apical edge of the blade should enter the sinus, it only pushes up the schneiderian membrane rather than cutting through it, as often happens with other types of implants.
If a blade implant is not absolutely firm after its final placement, it should be removed and replaced with an implant of the same design but of a slightly thicker dimension. The groove in such a case is not altered at all, and the wider implant should fit it snugly. If a longer and thicker second implant is judged desirable, the groove should be lengthened accordingly. A loose blade implant should never be left in the site; it will cause pain and discomfort to the patient.
|
|
Page 273 |
Next Page |
|
Copyright warning: This information is presented here for free for anyone to study online. We own exclusive internet copyrights on all content presented on this website. We use sophisticated technology to identify and legally close down websites that reproduce copyrighted content without permission - so please don’t do it.
|