| Theories and Techniques of Oral Implantology (vol.1) (published 1970) | Dr. Leonard I. Linkow |
|
|
Next Page |
| This is an archival HTML version of this book originally hosted here in 2006. The HTML may not display well on modern browsers. Please view the modern PDF Version for a better viewing experience. |
Single tooth implants 315
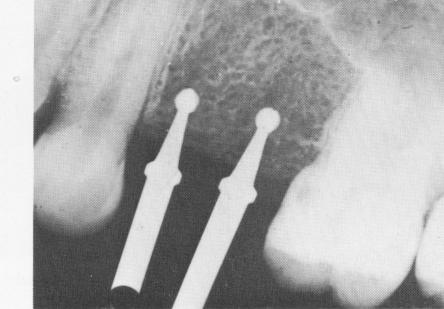
Fig. 8-11. A periapical intraoral radiograph showing 1 No. 6 round burs drilled into the edentulous bone.
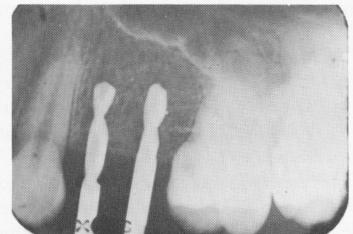
Fig. 8-12. Helical burs of various diameters are then drilled further into the holes made previously by the round burs.
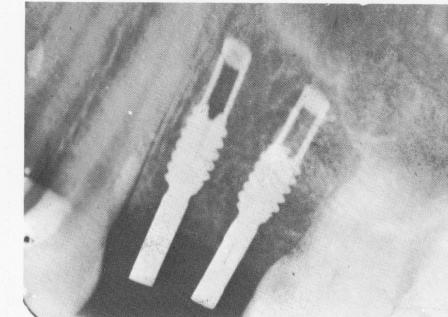
Fig. 8-13. Two self-tapping vent-plants in their proper positions.
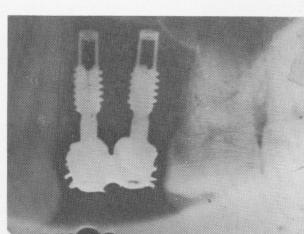
Fig. 8-14. A postoperative intraoral radiograph showing the acrylic-over-gold splint cemented over the implant shafts on the right side of the maxilla.
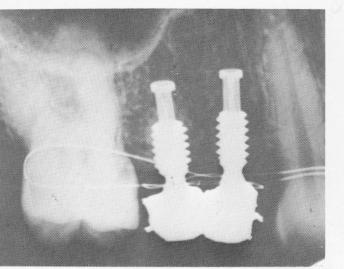
Fig. 8-15. The final prostheses cemented over the implants on the left side. Note the stainless steel .010 dead soft ligature wire used for temporary stabilization.
Fig. 8-16. The restorations as they appeared in the mouth.

|
|
Page 315 |
Next Page |
|
Copyright warning: This information is presented here for free for anyone to study online. We own exclusive internet copyrights on all content presented on this website. We use sophisticated technology to identify and legally close down websites that reproduce copyrighted content without permission - so please don’t do it.
|