| Theories and Techniques of Oral Implantology (vol.1) (published 1970) | Dr. Leonard I. Linkow |
|
|
Next Page |
| This is an archival HTML version of this book originally hosted here in 2006. The HTML may not display well on modern browsers. Please view the modern PDF Version for a better viewing experience. |
Single tooth implants 321
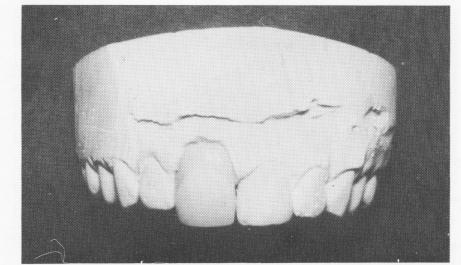
Fig. 8-34. An all-acrylic jacket processed over a hollow gold thimble was fabricated. Pink acrylic was also included above the labiogingival margin of the restoration in order to restore much of the gum tissue that had resorbed.
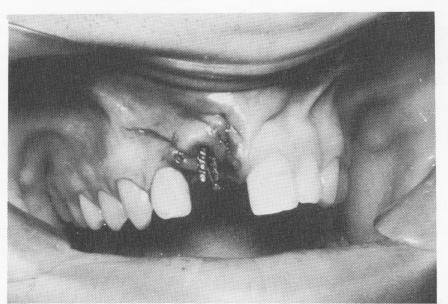
Fig. 8-35. Three pin implants were slowly drilled through the fibromucosal tissue and into the bone. Their apices diverged from one another as much as the anatomic land-marks allowed them.
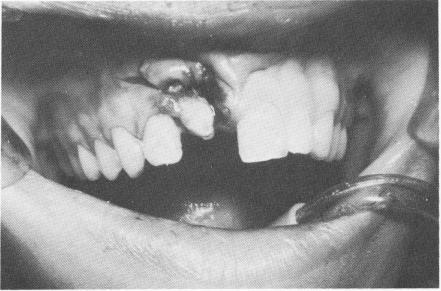
Fig. 8-36. The protruding notched pin implants were fused with an acrylic core.
otherwise. In this case, to aid stabilization the crown restoration over the triplant was A-splinted to both neighboring teeth.
The patient, a young male colleague, originally had his right central incisor knocked out while playing football. After performing root canal therapy with the tooth out of the mouth, the tooth was re-implanted by his dentist. A few years later, the entire root resorbed (Fig. 8-32) and the remaining corona] portion of the tooth was removed (Fig. 8-33). An impression of the edentulous space was taken, and an all-acrylic jacket over a gold thimble was processed. The restoration also contained pink acrylic on its labiogingival aspect to replace the lost gingival tissue (Fig. 8-34).
Three implant pins were slowly driven into the bone through the fibromucosal tissue as deep and as far apart as possible (Fig. 8-35). The ends of the pins were then notched with a fissure bur to make them more retentive for the acrylic core (Fig. 8-36). When the core hardened, a soft mix of acrylic was
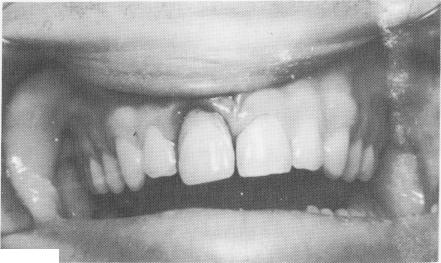
Fig. 8-37. The crown is cemented to the acrylic core with a loose mix of resin material.
placed inside the acrylic and gold thimble crown, which was cemented into position (Fig. 8-37). All excess acrylic was trimmed away, and the tooth was checked for proper occlusion. Then grooves were made with a small inverted cone bur on the lingual aspects of the acrylic crown and on the two neigh-boring teeth. With cold cure acrylic mixed to a loose consistency, two adapted and serrated gold wires were locked into position, thus stabilizing the implant. An x-ray was taken immediately after inserting and A-splinting the implant (Fig. 8-38, A).
Twenty-one months later another x-ray was taken (Fig. 8-38, B) . The implant crown was then separated from its A-splint (Fig. 8-39). The tooth was extremely loose after the splint was disassembled and was easily pulled out of the mouth with all three pins intact (Fig. 8-40) . The case was a failure. A triplant, even stabilized with an A-splint, should not have been attempted in this area. There is rarely enough bone here, and no amount of partial stabilization is adequate in such a situation.
|
|
Page 321 |
Next Page |
|
Copyright warning: This information is presented here for free for anyone to study online. We own exclusive internet copyrights on all content presented on this website. We use sophisticated technology to identify and legally close down websites that reproduce copyrighted content without permission - so please don’t do it.
|