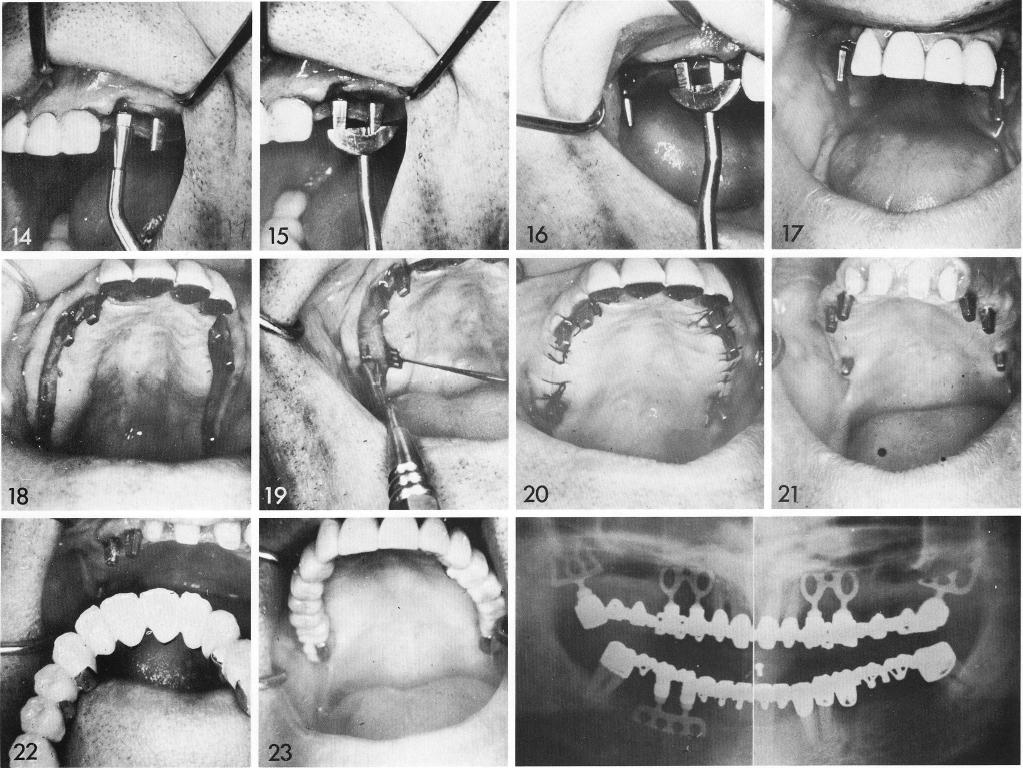
The photographic sequence in this case is excellent. The patient's problem was bilaterally edentulous posterior free-end areas (1,2). Upon exposure of the ridge (3), the bone appears wide enough—and the radiographs con-firm deep enough—for bladevents. First the channels are made (4). The left open-socket bladevent is matched to its channel (5), and bent into a curve (6) until it fits passively (7). It is left lodged there while the tuberosity blade-vent is tried (8). Bilaterally the procedure is repeated (9,10). Then one by one the bladevents are removed and the necks of the posts bent (11) until all posts are parallel with each other and the natural abutments (12). Then the bladevents are sunk home (13-15), sometimes with a little additional force applied to the more mesial post in the harder bone near the teeth (14). When all bladevents are properly seated (16-19), with the bottoms of the posts touching the crest, the tissues are sutured closed (20). A temporary appliance is used until the tissues heal (21), and then the final restoration is fabricated and inserted (22,23).