| Theories and Techniques of Oral Implantology (vol.2) (published 1970) | Dr. Leonard I. Linkow |
|
|
Next Page |
| This is an archival HTML version of this book originally hosted here in 2006. The HTML may not display well on modern browsers. Please view the modern PDF Version for a better viewing experience. |
Endosseous blade implants 477
incision should be at least 10 mm. longer than the mesiodistal dimension of the blade and must go straight down to the bone.) A thin groove was made through the cortical plate and down 5 or 6 mm. into the underlying cancellous bone with a No. 700L tapering fissure bur. The tissues were cleanly reflected away from the bone with a periosteal elevator (Fig. 11-35). With the alveolar ridge in clear sight, the operator can confirm his x-ray diagnosis as to its true shape.
The blade was then placed into the prepared groove (Fig. 11-36). The implant should be snug and sit so that its abutment post is parallel to the prepared tooth. If it is loose it should be substituted with a thicker blade. If the post is not parallel, further drilling of the post is necessary.
Once the implant was in correct position, it was
tapped further into the bone until its shoulders were slightly below the cortical plates. The site was then closed with sutures, and a temporary splint was placed over the implant and natural tooth abutments.
In about a week the patient was recalled. Since the tissue over the implant site had healed nicely (Fig. 11-37), impressions were taken for the fixed partial denture.
A gold coping was placed over the implant post and together with the veneer casting on the cuspid —was picked up with the plaster index. The fabricated bridge was tried in position (Fig. 11-38). After all necessary occlusal adjustments were accomplished, the bridge was cemented with oxyphosphate of zinc cement (Fig. 11-39). A final radiograph reveals the bridge and implant (Fig. 11-40).
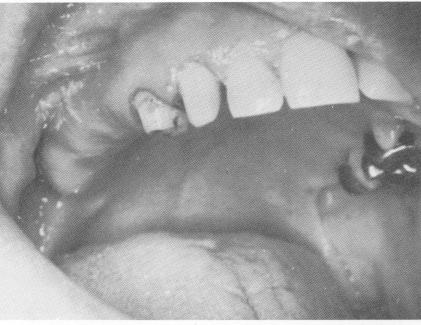
Fig. 11-41. The edentulous site.
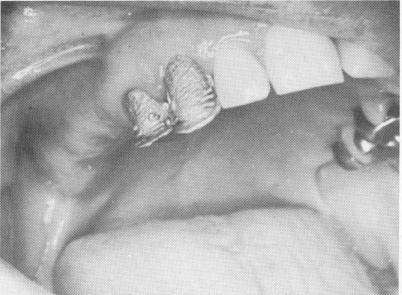
Fig. 11-42. The two anterior teeth prepared for full crown restorations.
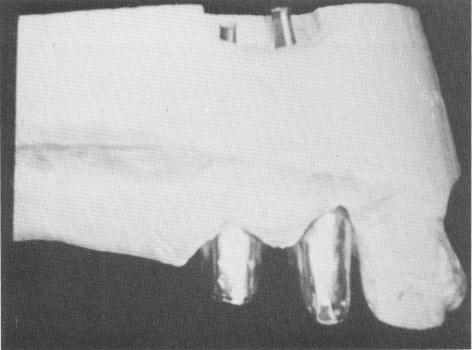
Fig. 11-44. Castings over prepared abutment teeth.
Fig. 11-43. The dies on master stone cast.

|
|
Page 477 |
Next Page |
|
Copyright warning: This information is presented here for free for anyone to study online. We own exclusive internet copyrights on all content presented on this website. We use sophisticated technology to identify and legally close down websites that reproduce copyrighted content without permission - so please don’t do it.
|