| Theories and Techniques of Oral Implantology (vol.1) (published 1970) | Dr. Leonard I. Linkow |
|
|
Next Page |
| This is an archival HTML version of this book originally hosted here in 2006. The HTML may not display well on modern browsers. Please view the modern PDF Version for a better viewing experience. |
318 Theories and techniques of oral implantology
part titanium powder to 2 parts acrylic powder) was processed, using the dry heat cure method. Titanium powder was incorporated into the root portion of the tooth only. At the same time, tinted acrylic—without the titanium powder, which would distort the shade—was used for the coronal portion of the tooth (Fig. 8-19). The processed tooth was then set into the socket and immediately ligated with .010 ligature wire (Fig. 8-20). This wire was left in place for about 6 weeks, then removed. The titanium powder made the root opaque on x-rays (Fig. 8-21) .
Case 4
A single tooth implant supported by gold rests
In this case a maxillary right central incisor lost in an accident 3 years previously was to be replaced with a single tooth implant (Fig. 8-22). The patient, a young, attractive girl in her late twenties, had been wearing a removable acrylic denture that held the missing tooth. An alginate impression of both arches and an accurate wax bite were taken. From the articulated casts, a prefabricated single tooth restoration of porcelain-baked-to-metal was processed (Fig. 8-23). Lingually, it contained two rests that fitted firmly against the lingual aspects of both neighboring teeth (Fig. 8-24). These rests prevented the tongue from pushing out the tooth labially. On the labial aspect, in order to prevent the tooth from being pushed lingually, the junction of the distolabioproximal line angle and the mesiolabioproximal line angle was fashioned to slightly overlap labially the same surfaces of the two teeth that flanked it on both sides (Fig. 8-25).
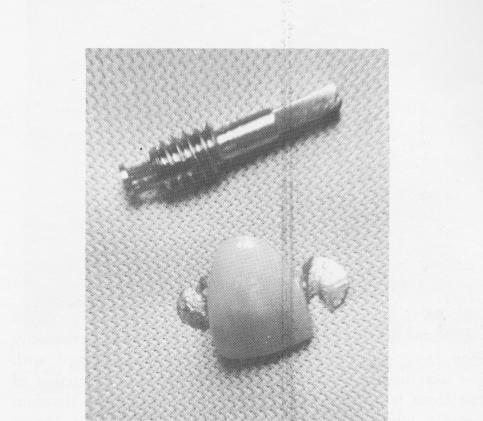
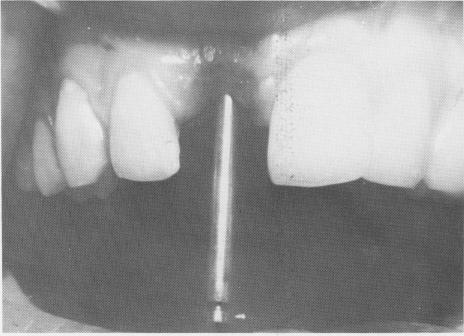
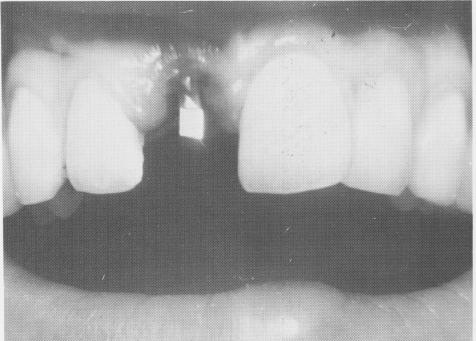
The operation for placing the implant began with a spear-point entering bur (Fig. 8-26), continued with the various size helical burs, and finished with the insertion of the implant (Fig. 8-27). The restoration was cemented into position (Fig. 8-28) and x-rayed (Fig. 8-29).
Two very similar cases using gold clasps were done by Raphael Chercheve. In one case, diagramed in Fig. 8-30, a prefabricated gold template with one lingual clasp extending around the lingual surface of the left lateral incisor was used. In the other case, two lingual extensions were used (Fig. 8-31). Both patients received spiral-post implants.
Case 5
A single tooth triplant stabilized by A-splinting
Despite the claims of some advocates, mostly Europeans, that a single tooth triplant restoration need not be stabilized, our experiences indicate
Fig. 8-25. The labial view of the restoration.
Fig. 8-26. A spear-point entering bur is used, followed by the various sized helical burs.
Fig. 8-27. The vent-plant is then threaded into position.
|
|
Page 318 |
Next Page |
|
Copyright warning: This information is presented here for free for anyone to study online. We own exclusive internet copyrights on all content presented on this website. We use sophisticated technology to identify and legally close down websites that reproduce copyrighted content without permission - so please don’t do it.
|